Monday, March 19, 2007

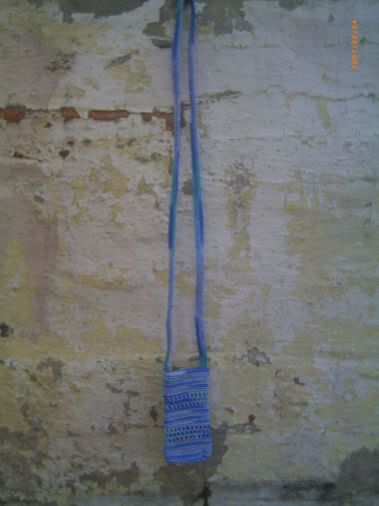
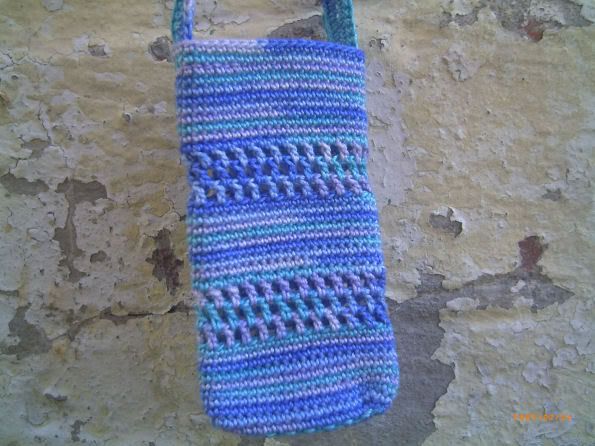
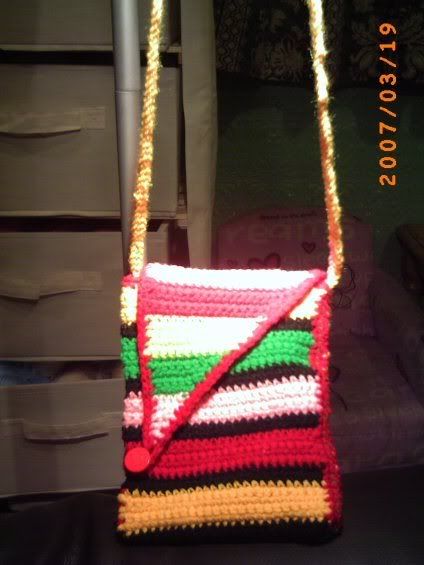
Caitlin's Purse


The whole thing...


Close-up of the body of the purse...


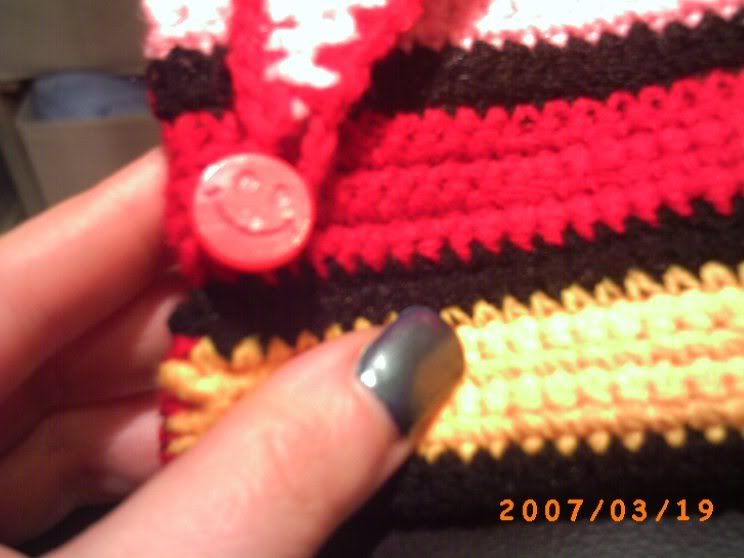
And an even closer close-up, so you can see the cute little button I found for it!!!
Caitlin had gotten a little craft kit from one of her friends as a late Christmas present, and we were both disappointed to find out that it was for nothing but making pom-poms. Pom-poms are okay for certain things, but what the heck is a 10 year old supposed to do with a BUNCH of them???

So I came up with the idea of using the yarn inside to make a purse for her (which she'd been dying for anyway) instead. She absolutely loved that idea, so Saturday night I sat down with the box and started crocheting away.

She didn't even see the entire completed project before going to bed (because I still had to finish the lining) but already she kept asking me "are you going to finish that tonight, Mom?" So I'm guessing she likes it.

And really, that's all that matters. It's HER purse, so as long as SHE likes it, nobody else's opinions matter worth a damn anyway. ;)

Friday, March 16, 2007

Ellie's BICO


Hayley asked me a few days ago to make Ellie a cardigan. I explained to her that I'd never done one before, but that I'd seen the posts on the 'ville about the BICO (Baby It's Cold Outside) cardigan from Crochet Me!, and it was supposed to be super-easy, so I'd try that one first.

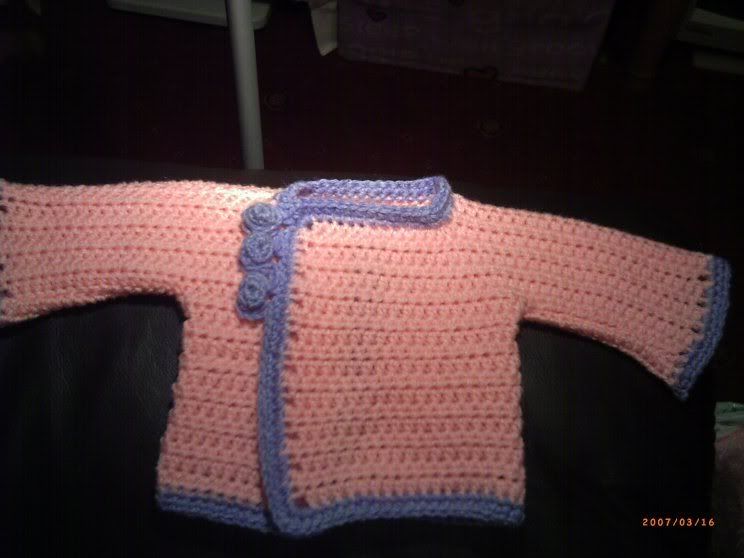
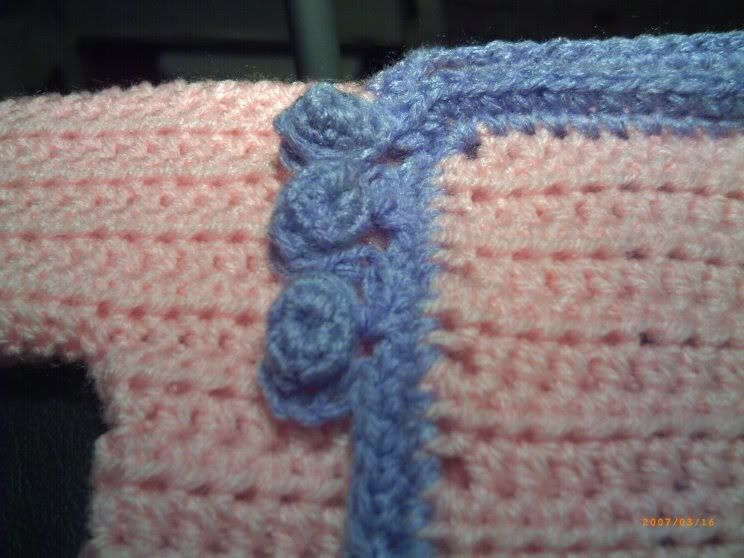
Well... here we are!

I used a different yarn and hook than what the pattern calls for, mainly because there's no way I could GET the yarn the pattern calls for (sold only in the U.S.). I ended up using baby dk yarn (slightly thinner than regular dk yarn) and an H hook. I made the pattern as indicated for the 12 month size, due to the changes in hook size and yarn.

It's hard to tell from the pictures, but it looks to me like this is something Ellie will be able to use now, instead of having to grow into.

I'll find out soon, though... I'm going to wash it tonight and hopefully I can get Hayley to bring Ellie over tomorrow for a fitting. Maybe she'll even let me take some pictures of Ellie in it! :D

Wednesday, March 14, 2007

Circle of Hope Tutorial

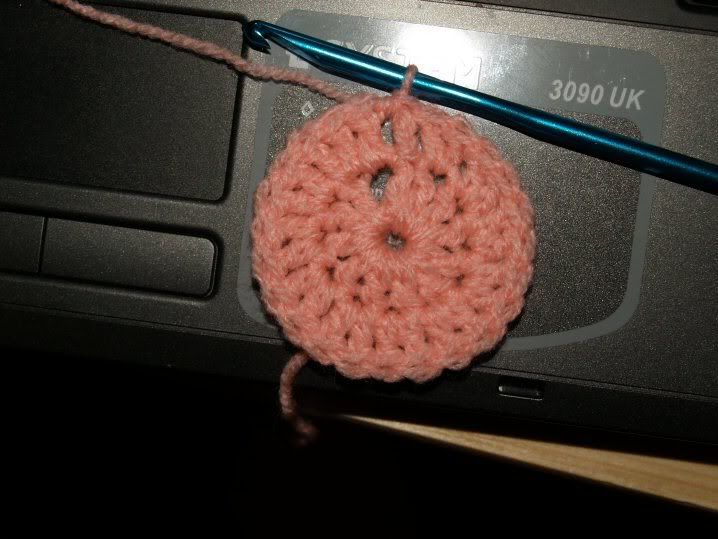
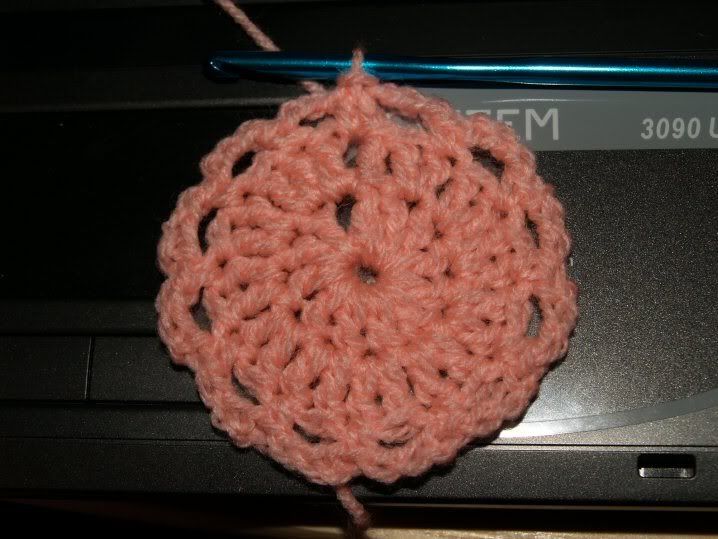
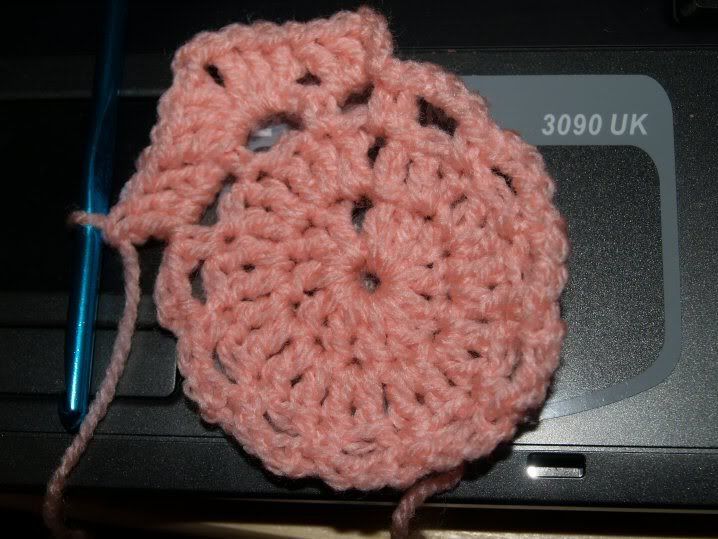
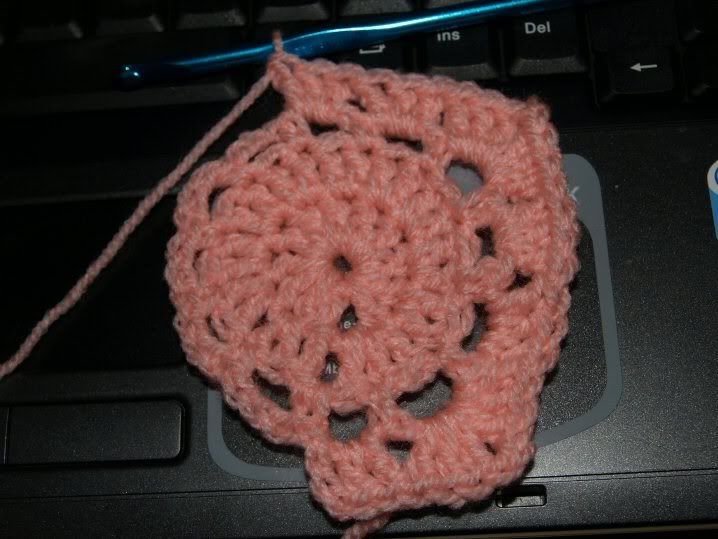
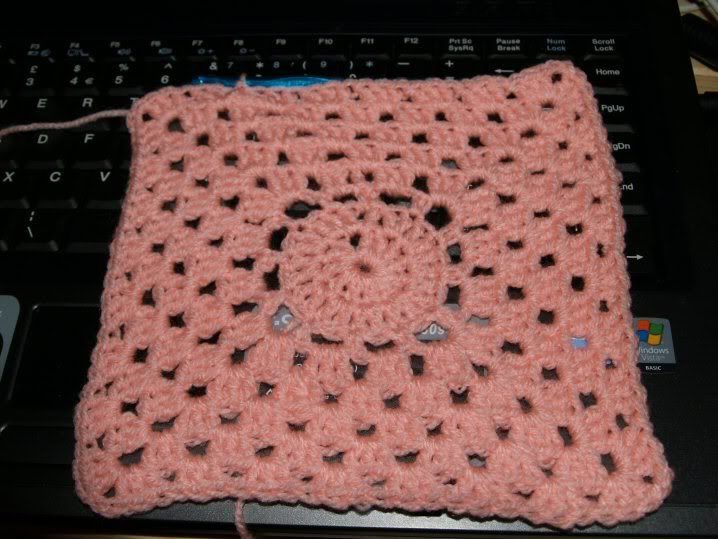
A lady over at the 'ville tried to make my Circle of Hope pattern as written... but ran into problems. So I thought I'd create a pictorial tutorial (try saying THAT 3 times fast! *lol*) to help her and anybody else who might have a problem with the pattern as written. So here it is!!

Circle of Hope
Suzanne Barrow’s Version
February 2007

Largely based on Melissa R. Green’s Circle of
Hopehttp://www.geocities.com/alyssa5000/circle.html

Materials:
Size H hook
About ½ oz. yarn

Makes a 7 inch square

Ch 4, join with a sl st to form a ring

Rnd 1: ch 3, 11 dc in ring, join


Rnd 2: ch 3, dc in same sp, 2 dc in next st and in each st around, join


Rnd 3: ch 1, sc in same sp, [ch 3, skip next st, sc in next st], repeat from [ to ] around, join.


Rnd 4: sl st into ch-3 sp, ch 3, 2 dc in ch-3 sp, [3 dc in next ch-3 sp, ch 2, 3 dc in same ch-3 sp, 3 dc in next 2 ch-3 sp], repeat from [ to ] around, join.


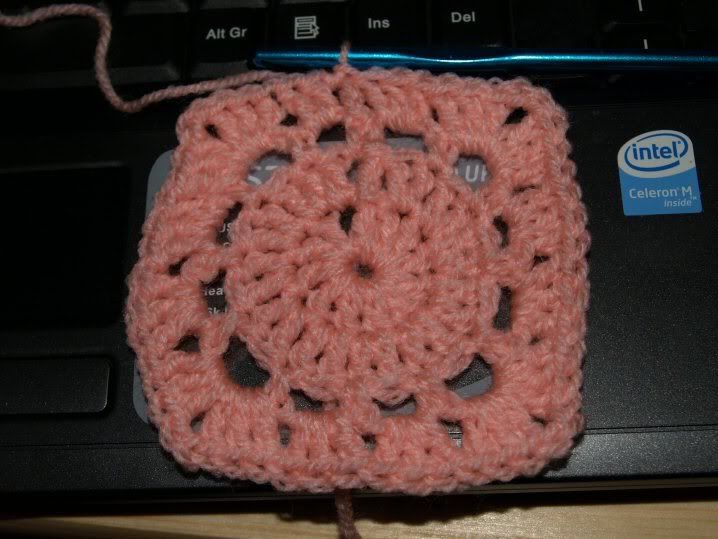
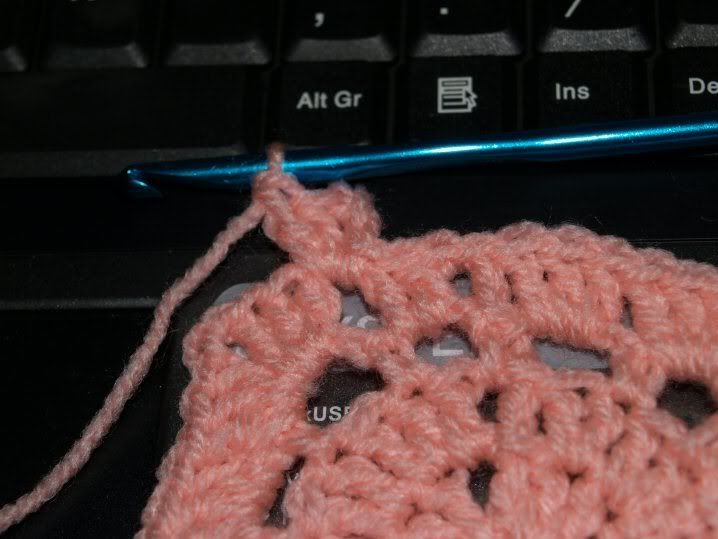
making the first corner

starting to look more like a square
There you go! From a circle to a square!

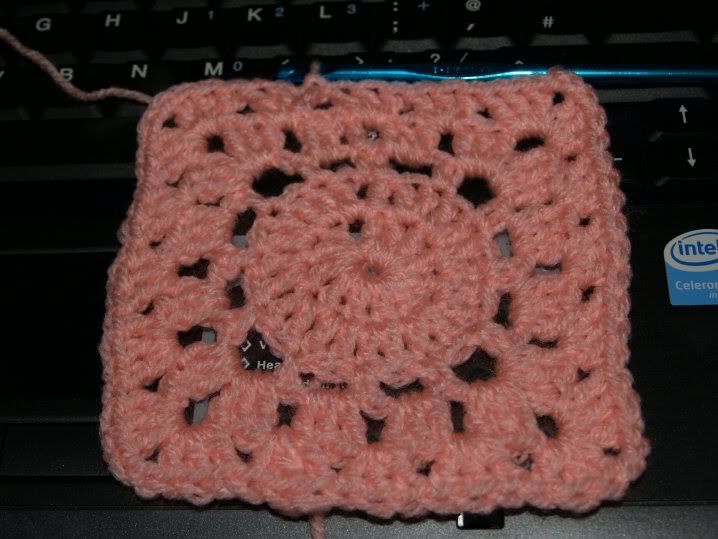
Rnd 5: sl st in first 2 dc and in the sp between 2 dc clusters. Ch 3, 2 dc in between the two clusters, [3 dc – ch 2 – 3 dc in next sp, 3 dc in next sp], repeat from [ to ] around


starting the next round

Round 5 all done!

Rnd 6 – 8: repeat pattern from Rnd 5, putting 3 dc – ch 2 – 3 dc in every corner.


Round 6

Round 7
Round 8

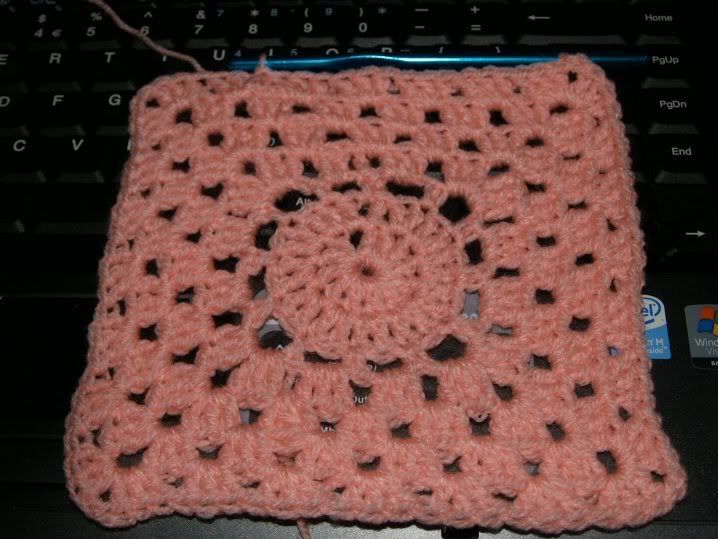
Rnd 9: sc in each st around, putting 3 dc in each ch-2 sp in the corners.Fasten off, weave in ends.


Round 9
I hope this helps. If there are any other questions, please don't hesitate to leave me a comment!!

Tuesday, March 13, 2007

Thread Pincushion


Made with Aunt Lydia's size 10 mercerized crochet cotton - "Ocean" color - using a Boye size 6 (1.80 mm) steel hook.

After making some of the "fun stuff" for my swap partner, and realizing I needed to buy straight pins, I realized I needed a pincushion. Hubby said to me "I can buy you one at the pound store, complete with pins and everything." But what fun would THAT be? Besides, I already BOUGHT the pins... I just needed something to stick them in!

And I just LOVE the color of this thread. I was dying to make something for myself with this stuff, but didn't know what. I need to make a pincushion, I have this thread that I want to use... make the pincushion with the thread!!!

I did take one suggestion from the hubby, though. He suggested I make it "smelly." So I put 5 drops of lavendar essential oil in the stuffing. It smells heavenly!!!

Wild & Woolie Swap


Angie's swap package went in the post today. I'm SO relieved!! It was getting WAY too close to the deadline. I didn't think it would take me so long to finish, but then again, I made certain things for my swap partner that I'd never made before, and I underestimated how long it would take me to do them. I can't wait until she gets it, so I can show off what I've made. I'm very proud of them, even if I DO say so myself. Hey - they MUST be pretty good, because my SIL has requested exact duplicates of 2 of the items, and a 3rd thing to go with one of them.

I'm just glad I finally got it all off to her. It was fun shopping, planning, and creating for her, but with the deadline fast approaching, I was starting to stress.

Monday, March 12, 2007

Comfortghan Squares for Jessie's Girls


These are the comfortghan squares I've done for Jessie's girls, Rory and Lori. Rory is around my Lexi's age (Lexi's 6), and Lori is only 2 1/2.

I know this isn't enough to take the pain of losing their father away from them, but I hope it helps even just a little bit. Hopefully when they're older, they'll understand what it is we're trying to do for them.

What they will never understand is that this is as much for us - those of us who are donating squares - as it is for them. Crochetville is a wonderful place, where people you don't even know will rally around you in your time of need, all you have to do is say something. I'd be willing to bet a lot of us are like me - meaning if circumstances allowed it, Jessie would have a huge group of people at her front door, asking what needed to be done. But we can't all do that, and so we've got to do SOMEthing. It's just the way we are.

Sunday, March 11, 2007

Comfortghan Squares for Jessie

Jessie, a woman I've been getting to know recently on the 'ville just lost her husband yesterday. She's a SAHM with 2 small children, and she's already had a lot to deal with lately. The timing of this couldn't be worse.

So another lady on the board immediately started organizing a comfortghan for her and her kids. I've still got a few finishing touches to put on my swap partner's package, but I decided this was important enough to put it off for just one day to get some squares done.

I'm going to do a couple more for the kids as well, but as it's already well past late here, they're going to have to wait until the morning.

My heart hurts for Jessie. She's been so supportive to a small group of us who are trying to do some "self-improvement," and like I said before, she's been through so much lately. It's times like this when I wish I was lucky enough to be rich. If I had an unlimited supply of money, I'd be on a plane right now. I'd just show up on her doorstep and say "what do you need me to do?" - AFTER I gave her a big hug, of course.

But I don't have an unlimited supply of money. So the closest thing to a hug she's going to get from me is to know that a couple of the squares in her 'ghan came from me. So I guess that'll have to do. It's not enough, but it's something.

Wednesday, March 07, 2007

WiP Wednesday, March 7, 2007

Photobucket - Video and Image Hosting


I've been so busy working on my Wild & Woolie Swap partner's items that I haven't gotten anything else done this past week.

But I am really pleased with how they're turning out. They're nearly done - just a few finishing touches left that I need to do. Hopefully I'll be able to get her package out by this weekend - Monday at the very latest. Once I know that she's received it, I'll be posting pictures of what I've made her.

Also, I've had a request from Ellie's mom (Hayley) for a cardigan. I showed her the BICO, because I've heard they're super easy - and I've never actually DONE a wearable before that wasn't a poncho or a shawl. So I'm going to be starting that soon. I've already got the yarn for it, I just want to make sure I get this swap stuff done before I start on anything new.

Monday, March 05, 2007

Crochet is definitely "IN"!!

Photobucket - Video and Image Hosting


I snapped this pic in the window of Monsoon in The Bridges today. From what I understand - from my SIL, and from the various people I've spoken to around town regarding shopping and fashion trends, Monsoon is one of THE places to shop. I'm talking like I'm a total freak of nature because I DON'T shop there.

But I happened to walk past there this morning on my way to another shop, and when I saw this, I just had to backtrack. I wasn't sure at first if it really was crocheted or not, but when I looked a bit closer, I saw that sure enough, it's definitely crocheted. So I had to whip out my phone and snap a pic (aren't camera phones great? *hehe*).

If they're putting things like this on display at a shop like this, then crochet is definitley "IN"! Now if only people would realize that these things ARE crocheted, then they wouldn't look at me like I've grown a second head when I tell them I crochet, NOT knit (or more accurately, I crochet WAY better than I knit!).

Wednesday, February 28, 2007

WiP Wednesday, February 28, 2007

Photobucket - Video and Image Hosting


Sorry, photophiles (is that a word? *lol*) no pics this week.

Why?

Well... I'll tell ya! If you'll look to my sidebar on the right over there ~~~>, you'll see that I've joined another swap. The Wild & Woolie Swap over at the 'ville. I was reluctant to join another swap after the fiasco I made of the last one, but right before the signups opened, our financial situation changed drastically, and I knew I wouldn't have a problem being able to get supplies or getting it out on time.

So now that I've got all of Ellie's gifts done and out of the house, I've been concentrating on getting my partner's items done. She's getting some wool (obviously!!), and I'm also making a few little "extras" to put in her package. So far one item is about 30% done, another is 90% done, and another is 99% done (just need to weave in ends). I have TAKEN pics, but I'm not uploading them until I know my partner has gotten her package. Don't want to ruin the surprise!!!!

I'm having fun, though. A lot more fun than I did last time, because I don't have to worry. "Am I going to be able to get this done on time?" Yup. "Am I going to be able to get this OUT on time?" Yup. The only worry I have is whether or not she's going to like it, but then again, other people who have seen the items have had nothing but good things to say about them. My SIL wants an exact duplicate of one of the items, and even Hubby says I should make more of one of the other items and try selling them! So... *fingers crossed*... my partner (Angela) SHOULD like them.

I hope!!

Sunday, February 25, 2007

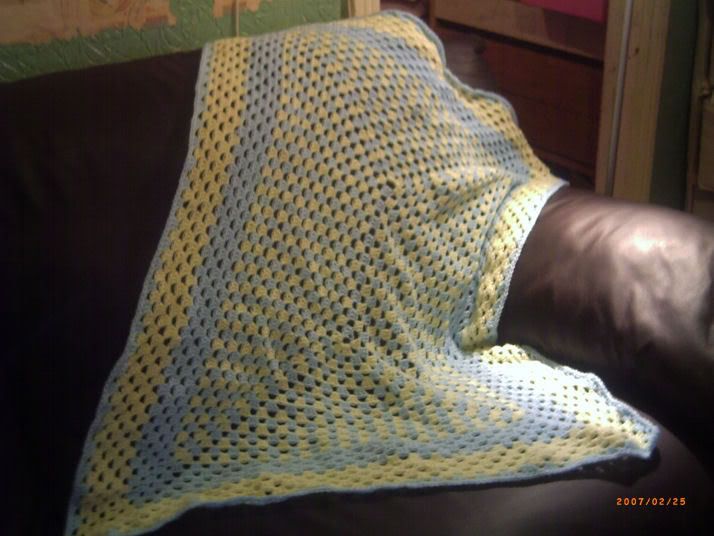
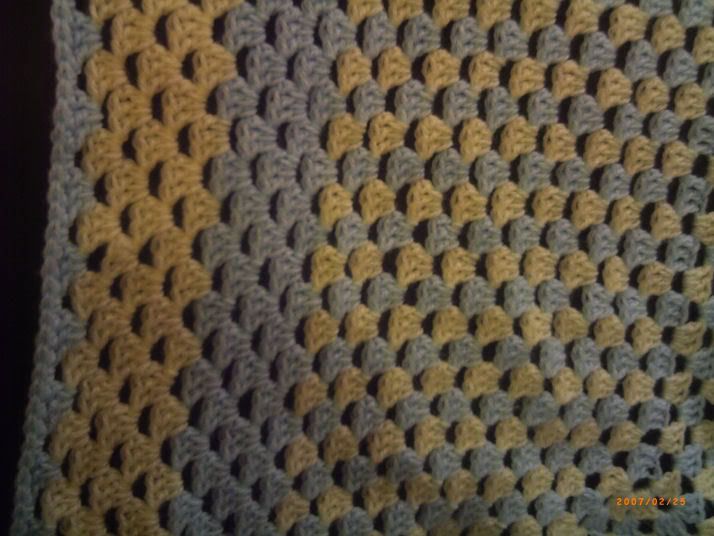
Blue and Yellow Rectangular Granny Afghan


Made from Erin Lindsay's rectangular granny square pattern, using baby dk weight yarn... although I can't remember what size hook. Because:

This is actually quite an old one. I started it back in June/July, and had it finished by mid-July. It was for my neighbor's niece (Ellie's mom's cousin), who had a baby boy in July.

I told my neighbor that it was done, and told her that when Gemma (her neice) came over to visit, to have her stop at my house and get her blanket. She never came. (Methinks my neighbor forgot to tell her.)

So while cleaning and organizing my stash, I put all of my FO's in a storage box, and this happened to be one of them.

Well, I happened to run into Gemma a couple of weeks back while the kids and I were out shopping, and I thought to mention this afghan that I have had for months... and months... and months!

Tonight (FINALLY!!), Hayley (my neighbor's daughter, Ellie's mom) came over and said that her aunt Carol (Gemma's mom) was over and had asked about the blanket.

So now I have a little more room in my FO box... what to put in it next? Decisions, decisions. *lol*

Friday, February 23, 2007

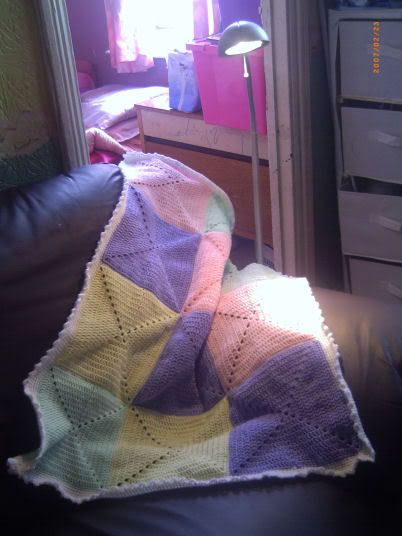
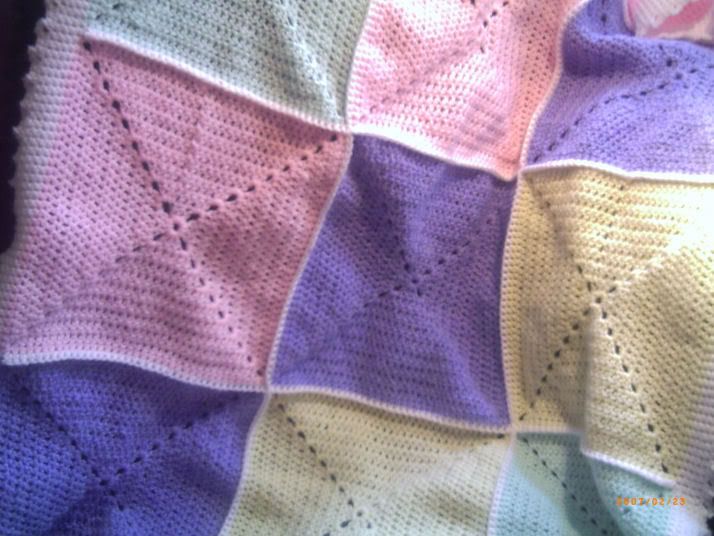
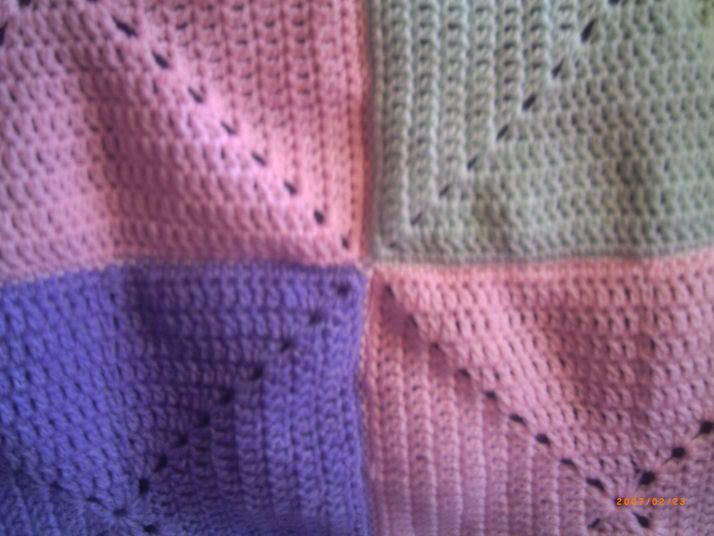
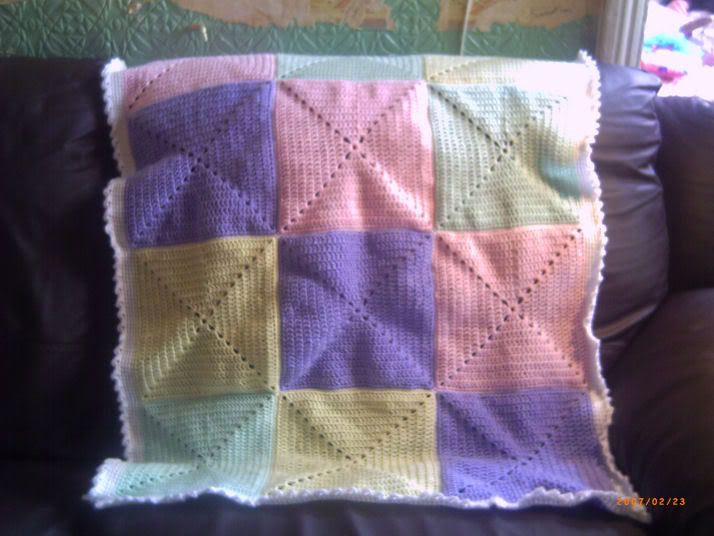
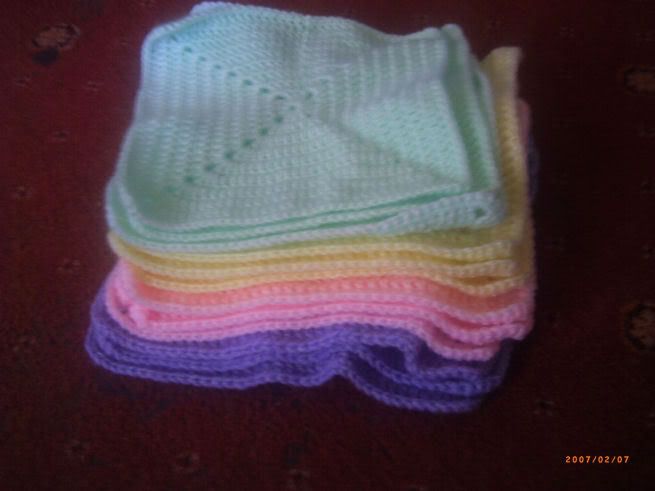
Ellie's Baby Granny


I **FINALLY** finished it!!!!
This was, of course, made without a pattern. Just make-up-as-you-go.
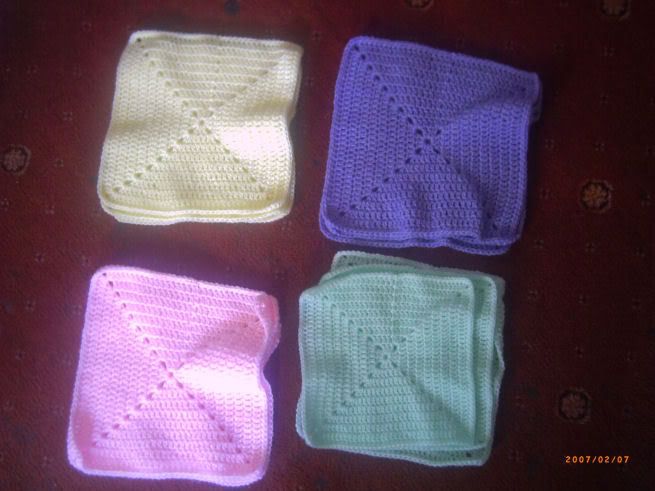
There are 3 squares each of purple, pink, green, and yellow, sc'd together (as you can see if you look at the pictures above). I prefer to sc squares together - it's quicker and seems stronger to me.
The border is 4 rounds of sc and 1 round of 3sc, ch 3, 3sc (without skipping any sc's). that's what gives it the ruffly/key-hole look.
The whole thing was made with dk baby yarn and an H hook.

Ellie's Baby Bonnet


Made from this pattern here.
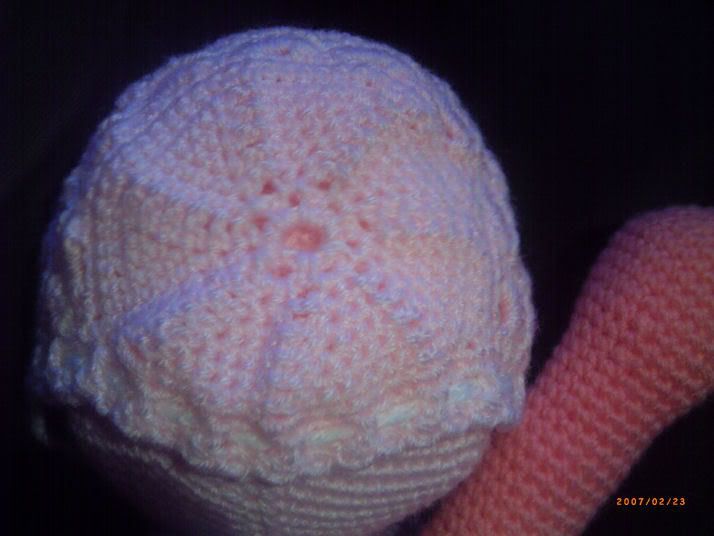
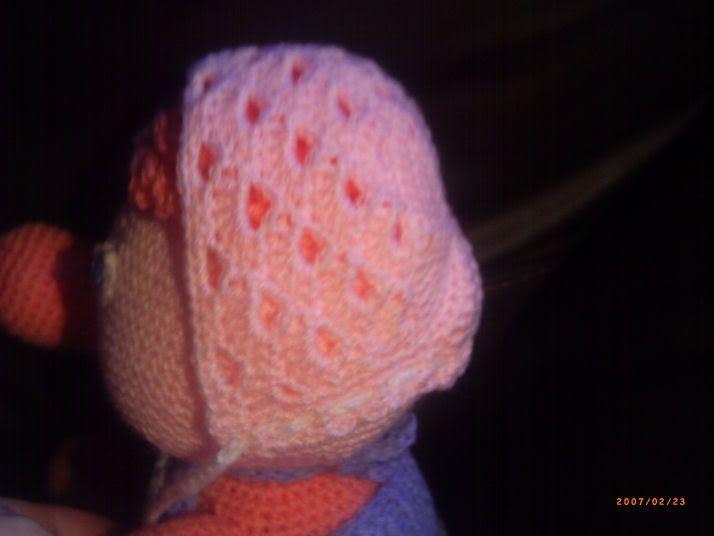
I hadn't actually PLANNED on making a bonnet... but I had a pretty long bus ride to my oldest dd's school, and went looking for a small and quick project I could take with me to work on during the ride. I found this and just could NOT resist.
It's made with dk baby yarn and an F hook. I finished most of it on the bus ride and only had a few rows to do when I got home that afternoon.
As you can see, her baby doll is the model, as Ellie herself hasn't even seen it yet. I just washed it and it's in the dryer now. As it's already 9 p.m. here, I'll give it to her in the morning.

Monday, February 19, 2007

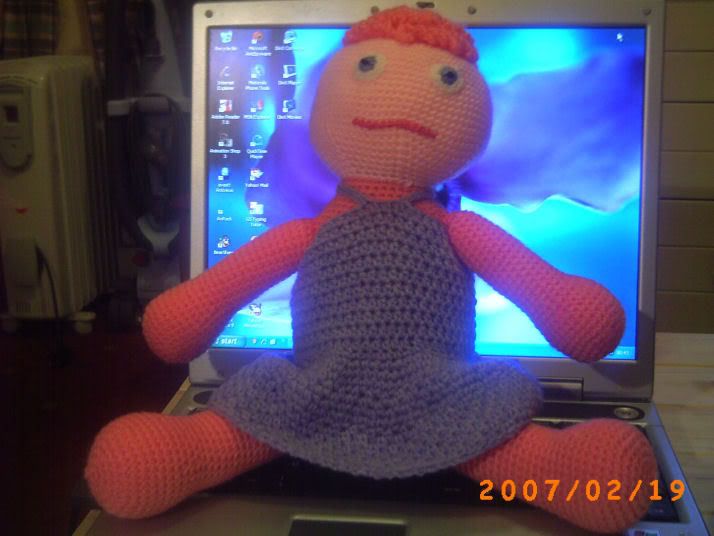
Ellie's Baby Doll


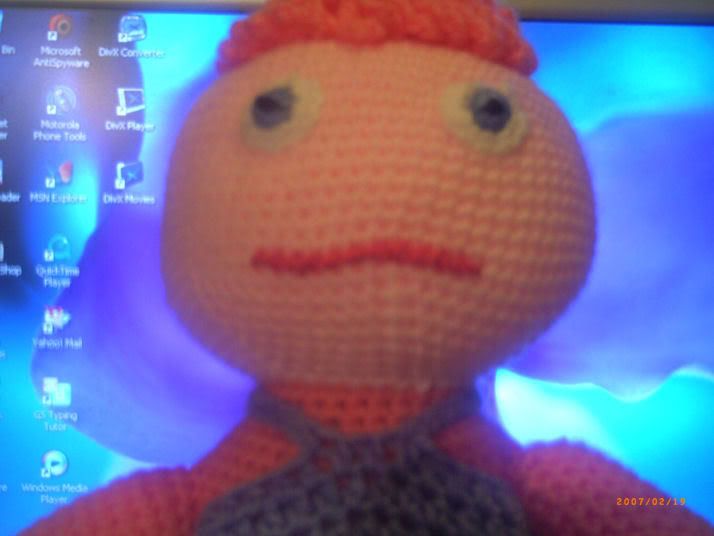
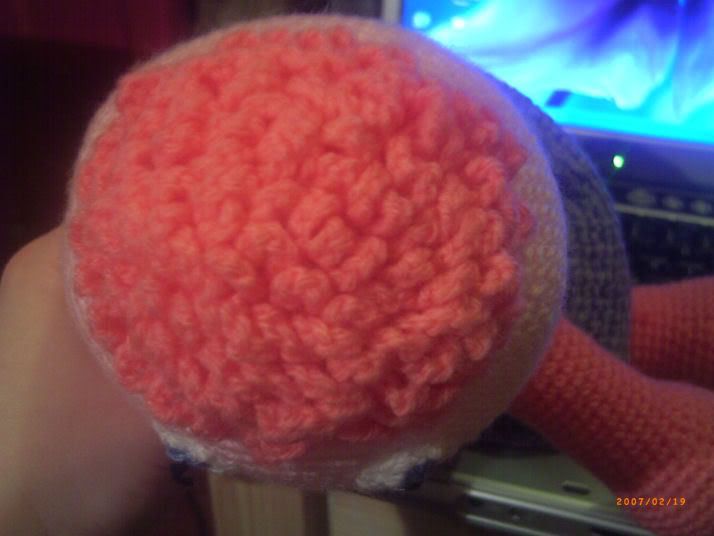
This is, of course, her head

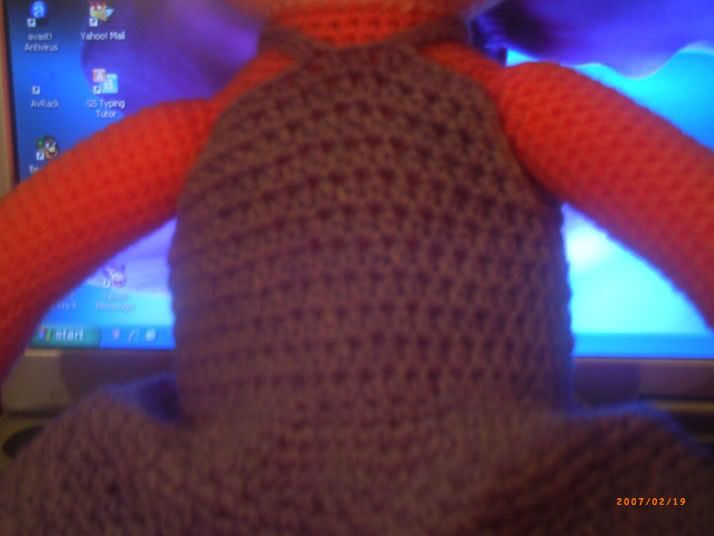
And her bod.

A leg.

Her hair (as cute as it looks, it's a pain in the ASS to do!!!).


And here she is in her entirety.
I didn't follow a pattern when I made her... I made up my own!!! *yay me!!* *lol*
I wrote it down as I went along, and I'm going to share it here, just in case anybody's interested in making one like it.

Ellie – a baby doll to crochet
Suzanne Barrow
© 2007

Materials needed:
Yarn of your choice
Complimentary hook (you don’t want to wear the skin off your fingers trying to push the hook through your work, but you DO want your stitches nice and tight).
Stitch markers
Stuffing

Notes:
Use your stitch marker to mark the first stitch in the ring.
The adjustable ring can be found here.

Head

Using an adjustable ring, sc 6 sts into ring, and pull to close.

Round 1: 2 sc in each st around (12 sts)
Round 2: {2 sc in first st, 1 sc in next st}, repeat from { to } around (18 sts)
Round 3: {2 sc in first st, 1 sc in next 2 sts}, repeat from { to } around (24 sts)
Round 4: {2 sc in first st, 1 sc in next 3 sts}, repeat from { to } around (30 sts)
Round 5: {2 sc in first st, 1 sc in next 4 sts}, repeat from { to } around (36 sts)
Round 6: {2 sc in first st, 1 sc in next 5 sts}, repeat from { to } around (42 sts)
Round 7: {2 sc in first st, 1 sc in next 6 sts}, repeat from { to } around (48 sts)
Round 8: {2 sc in first st, 1 sc in next 7 sts}, repeat from { to } around (54 sts)
Round 9: {2 sc in first st, 1 sc in next 8 sts}, repeat from { to } around (60 sts)
Round 10: {2 sc in first st, 1 sc in next 9 sts}, repeat from { to } around (66 sts)
Round 11: {2 sc in first st, 1 sc in next 10 sts}, repeat from { to } around (72 sts)
Rounds 12 – 23: sc in each st around (72 sts)
Round 24: {sc 2 tog [sc dec], 1 sc in next 10 sts}, repeat from { to } around (66 sts)
Round 25: {sc 2 tog, 1 sc in next 9 sts}, repeat from { to } around (60 sts)
Round 26: {sc 2 tog, 1 sc in next 8 sts}, repeat from { to } around (54 sts)
Round 27: {sc 2 tog, 1 sc in next 7 sts}, repeat from { to } around (48 sts)
Round 28: {sc 2 tog, 1 sc in next 6 sts}, repeat from { to } around (42 sts)
Round 29: {sc 2 tog, 1 sc in next 5 sts}, repeat from { to } around (36 sts)
Round 30: {sc 2 tog, 1 sc in next 4 sts}, repeat from { to } around (30 sts)
Fasten off, leaving a long tail for sewing.

Body

Using an adjustable ring, sc 6 sts into ring, and pull to close. Use your stitch marker to mark the first stitch in the ring.
Round 1: 2 sc in each st around (12 sts)
Round 2: {2 sc in first st, 1 sc in next st}, repeat from { to } around (18 sts)
Round 3: {2 sc in first st, 1 sc in next 2 sts}, repeat from { to } around (24 sts)
Round 4: {2 sc in first st, 1 sc in next 3 sts}, repeat from { to } around (30 sts)
Round 5: {2 sc in first st, 1 sc in next 4 sts}, repeat from { to } around (36 sts)
Round 6: {2 sc in first st, 1 sc in next 5 sts}, repeat from { to } around (42 sts)
Round 7: {2 sc in first st, 1 sc in next 6 sts}, repeat from { to } around (48 sts)
Round 8: {2 sc in first st, 1 sc in next 7 sts}, repeat from { to } around (54 sts)
Round 9: {2 sc in first st, 1 sc in next 8 sts}, repeat from { to } around (60 sts)
Rounds 10-34: sc in each st around (60 sts)
Round 35: {sc 2 tog, 1 st in next 8 sts}, repeat from { to } around (54 sts)
Round 36: sc in each st around (54 sts)
Round 37: {sc 2 tog, 1 st in next 7 sts}, repeat from { to } around (48 sts)
Round 38: sc in each st around (48 sts)
Round 39: {sc 2 tog, 1 st in next 6 sts}, repeat from { to } around (42 sts)
Round 40: sc in each st around (42 sts)
Round 41: {sc 2 tog, 1 st in next 5 sts}, repeat from { to } around (36 sts)
Round 42: sc in each st around (36 sts)
Round 43: {sc 2 tog, 1 st in next 4 sts}, repeat from { to } around (30 sts)
Round 44: sc in each st around (30 sts)
Fasten off

Arms (make 2)

Using an adjustable ring, sc 6 sts into ring, and pull to close. Use your stitch marker to mark the first stitch in the ring.
Round 1: 2 sc in each st around (12 sts)
Round 2: {2 sc in first st, 1 sc in next st}, repeat from { to } around (18 sts)
Round 3: {2 sc in first st, 1 sc in next 2 sts}, repeat from { to } around (24 sts)
Round 4: {2 sc in first st, 1 sc in next 3 sts}, repeat from { to } around (30 sts)
Round 5-9: sc in each st around (30 sts)
Round 10: {sc 2 tog, 1 sc in next 3 sts}, repeat from { to } around (24 sts)
Round 11: sc in each st around (24 sts)
Round 12: {sc 2 tog, 1 sc in next 2 sts}, repeat from { to } around (18 sts)
Round 13-29: sc in each st around (18 sts)
Round 30: {sc 2 tog, 1 sc in next st}, repeat from { to } around (12 sts)
Round 31: sc in each st around (12 sts)
Fasten off, leaving a long tail for sewing.

Legs (make 2)

Using an adjustable ring, sc 6 sts into ring, and pull to close. Use your stitch marker to mark the first stitch in the ring.
Round 1: 2 sc in each st around (12 sts)
Round 2: {2 sc in first st, 1 sc in next st}, repeat from { to } around (18 sts)
Round 3: {2 sc in first st, 1 sc in next 2 sts}, repeat from { to } around (24 sts)
Round 4: {2 sc in first st, 1 sc in next 3 sts}, repeat from { to } around (30 sts)
Round 5: {2 sc in first st, 1 sc in next 4 sts}, repeat from { to } around (36 sts)
Round 6-10: sc in each st around (36 sts)
Round 7: {sc 2 tog, 1 sc in next 4 sts}, repeat from { to } around (30 sts)
Round 8: sc in each st around (30 sts)
Round 9: {sc 2 tog, 1 sc in next 3 sts}, repeat from { to } around (24 sts)
Round 10-30: sc in each st around (24 sts)
Round 31: {sc 2 tog, 1 sc in next 2 sts}, repeat from { to } around (18 sts)
Round 32: sc in each st around (18 sts)
Fasten off, leaving a long tail for sewing.

Sew head to body; arms to body; and legs to body. If you want to add hair, add it any way you want. If you want to make clothes for your doll, by all means do so. But if you prefer your dolls nekkid, that’s okay too.
Saturday, February 10, 2007

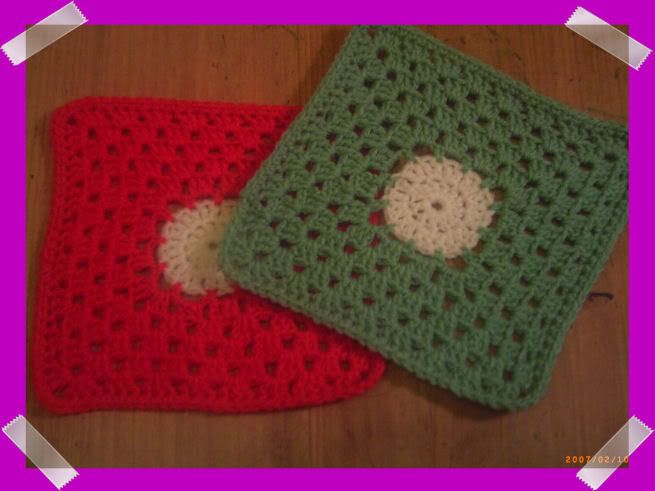
Comfortghan Squares


I was trying to make the Circle of Hope square, but wasn't having much luck. It didn't matter how many times I frogged it and started over, it just never looked right. I don't know if there's an error in the pattern somewhere, if I kept making the same mistake over and over, or if I was just having a really long blond moment. *lol* Whatever it was, I just could NOT get it, no matter what I did.

So I had the wonderful idea of frogging back to a certain point and making it up on my own as I went. That worked! And I liked the "Circle of Hope" idea so much that I ditched the idea I'd had for the second square and just made another one in another color.

I've written up the instructions for what I did in case somebody would like to copy my idea. I really just followed the original pattern for the first few rounds, but rather than send somebody flipping through 2 different patterns back and forth, I wrote it all down. I have to give credit where credit is due, however, and reiterate that the first few rounds are NOT my creation. It's only from Round 4-on that is MY creation. It's not exactly a difficult pattern, but ya never know when some crochet newbie might stumble along on my blog, see this and think "I wanna do that!" In that case, a pattern would be a good thing. :)

Circle of Hope
Suzanne Barrow’s Version
February 2007


Largely based on Melissa R. Green’s Circle of Hope
http://www.geocities.com/alyssa5000/circle.html

Materials:
Size H hook
About ½ oz. yarn

Makes a 7 inch square

Ch 4, join with a sl st to form a ring

Rnd 1: ch 3, 11 dc in ring, join
Rnd 2: ch 3, dc in same sp, 2 dc in next st and in each st around, join
Rnd 3: ch 1, sc in same sp, [ch 3, skip next st, sc in next st], repeat from [ to ] around, join.
Rnd 4: sl st into ch-3 sp, ch 3, 2 dc in ch-3 sp, [3 dc in next ch-3 sp, ch 2, 3 dc in same ch-3 sp, 3 dc in next 2 ch-3 sp], repeat from [ to ] around, join.
Rnd 5: sl st in first 2 dc and in the sp between 2 dc clusters. Ch 3, 2 dc in between the two clusters, [3 dc – ch 2 – 3 dc in next sp, 3 dc in next sp], repeat from [ to ] around
Rnd 6 – 8: repeat pattern from Rnd 5, putting 3 dc – ch 2 – 3 dc in every corner.
Rnd 9: sc in each st around, putting 3 dc in each ch-2 sp in the corners.

Fasten off, weave in ends.

That's it. Easy-peasy, lemon-squeezy, as they say out here. Once I decided to do it MY way, these two squares took me less than 2 hours to complete, including weaving in ends and everything. Not bad for a night's work. I just hope the recipient likes them as much as I do!

Friday, February 09, 2007

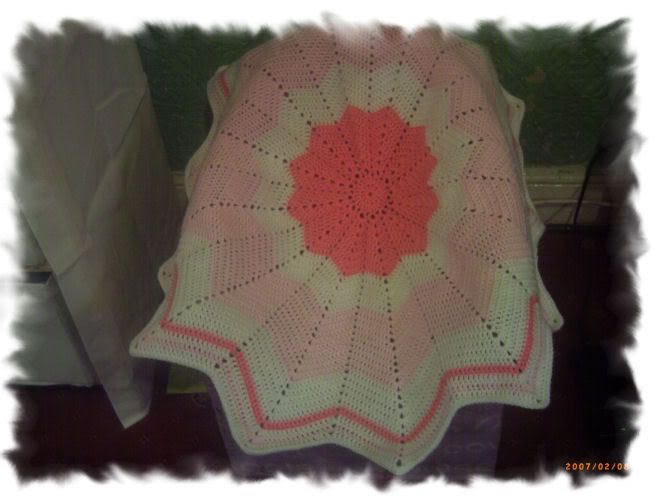
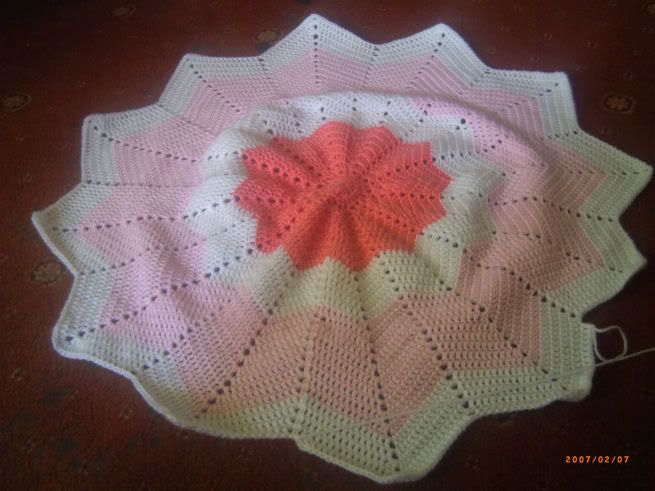
The Round Ripple is FINITO!!!!


Finally!!!

Of course, to be honest, it really didn't take me all that long. But it FELT like it took forever. Now that I think about it, the baby afghans that I made for my children and my niece and nephew took longer, but this one seemed to drag on and on forever.

Now that it's finished, I'll tell y'all the details. It's made from dk (double knitting) weight yarn, with an F (Susan Bates) hook. Since I used 2 partial skeins for the 2 different shades of pink and not even a whole skein of the white, I can't be absolutely certain, but if I had to guess, I'd say it used about 1 1/2 skeins of yarn (100g skeins). It's not very big, but it's not supposed to be. The baby granny is going to be much bigger. I'm thinking this one would be great to use in her buggy when it starts getting a bit warmer out, but it's not so warm that she wouldn't need anything at all. (Of course, to be quite honest, it rarely gets that warm here anyway.)

I got the pattern here. I have to thank the ladies of the 'ville for that - I kept seeing these round ripples all over the place, and didn't know where to find the pattern. But the 'ville has this really nifty search option, so I did a search, and whaddya know? Somebody had posted the link to the pattern. Lucky me! *lol*

It still needs to be washed (I ALWAYS wash items before gifting them - it softens up the yarn and they get the delicious smell of my fabric softener! *lol*), but I'm not giving it to Ellie until I get her other stuff done anyway. I may start assembling her baby granny tonight, if I have time. Regardless, it should only be a few days more before I've got everything finished (I'm making her a little stuffy with the scraps left over as well) and can take it all next door.

Wednesday, February 07, 2007

WiP Wednesday - February 7, 2007

Photobucket - Video and Image Hosting


I'm nearly there!!!!


The baby granny is ready to assemble. That's all that needs to be done, aside from a border - but I can't put a border on it until I ASSEMBLE it! *cheeky grin*


And the round ripple is well on its way to being done. I've got another row to do of the white, and then I think I'm going to do one row of the coral/peachy-pink, one white, one light pink, one white... and then that's it. This one isn't going to be very big - but it's not SUPPOSED to be very big. I'm thinking it'll be good for use on the buggy, especially when it gets warmer but not warm enough to go without anything.

I've also done a bonnet for the baby, but I need one of the kids to find me a model (read: baby doll) before I can take a proper picture of it.

And I've decided something. For every project I finish, I'm allowed to start a new one. BUT... I ALSO have to work on a UFO while I'm working on the new project. I used to be able to just work on one project at a time, but nowadays, I get bored working on the same thing day after day after day. Which is why I've had so many WiPs going at once. But I've got a few things that have been sitting in the UFO pile for almost a year. So this way, I get to work on more than one thing at a time, I DO get to work on something new, BUT I also get some of my UFOs out of the way, too.
I think the green & white shawl I started back in AUGUST will be the first UFO to be pulled out of the pile. I've got some that have been sitting there longer, but if i don't get this shawl done soon, then it's going to be too warm for the person it's intended for to USE. But... it's getting frogged before it gets finished. I've decided I don't want to do it in the shape I have it now. I want to try a half-moon shape instead. It looks better, in my opinion, and it looks like it would be easier to wear at the same time. So (hopefully) that'll be on my WiP Wednesday page for next week.
Happy Hookin'!!!

Sunday, February 04, 2007

iPod nano cosy


I made this as a "just for the hell of it" gift for my SIL, Vicci (the one who brought me that GORGEOUS yarn that I'm making a scarf from). She got a new blue iPod for Christmas from her boyfriend, and she was moaning to me that she couldn't find "socks" for it. And I just happened to have the perfect thread to match her iPod, so I figured... why the hell not?

I used Aunt Lydia's crochet thread (mercerized cotton), size 10, variegated color "Ocean." It's crocheted in rounds, alternating 11 rounds of sc, 3 rounds of dc, 9 rounds of sc, 3 rounds of dc, and 11 rounds of sc. Very simple.

I got the actual dimensions of the iPod online, thanks to Argos website. I made a chain, measured it, did one round, measured again to make sure, and just went from there until it was the right height. So simple it's not even funny.

I'm considering making more of these and selling them online at Etsy. I'm just waiting for the "experts" at the 'ville to give me some feedback before I make a final decision. Of course, I wouldn't exactly complain if I got some feedback here, either! ;)

Wednesday, January 31, 2007

WiP Wednesday - January 31, 2007

Photobucket - Video and Image Hosting


Well I've had a busy week - unfortunately not a busy CROCHETING week. Life as a domestic goddess can get quite hectic at times. And now that Hubby is in college, it's even worse. Since he's gone from 6:45 a.m. - 6:15 p.m., he's not around even to get my oldest off the taxi at the end of the day, so I find myself rushing back and forth between home and the other kids' school. It's crazy.

click me to enlarge!

But I did get some work done on the round ripple I started. And if you'll scroll down, you'll see the fun fur scarf I knitted for Caitlin (9 y.o) last weekend.

click me to enlarge!


Last night I started on one of the final squares I need for the baby granny I'm doing for my friend's granddaughter. I haven't even done 4 rounds of it yet, but hey... a start is a start, right? :)

click me to enlarge!!


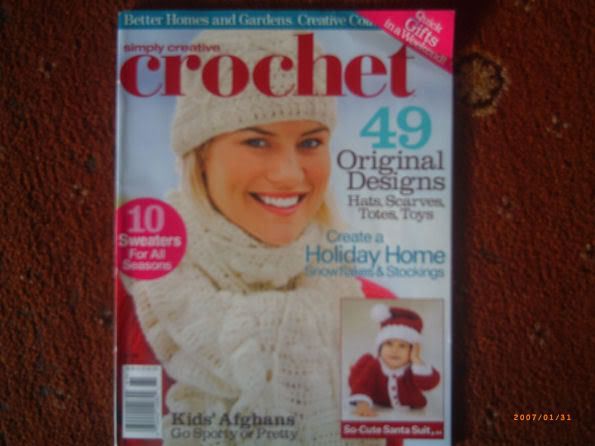
And I got something nice in the mail today. I posted a request on the 'ville for a copy of the December issue of Better Homes and Gardens' Simply Creative Crochet. It's got a pattern in there for an absolutely gorgeous bell-sleeved tunic sweater that I just HAD to have. But living in the UK, it's almost impossible for me to get on my own. Well, a very kind member, Sherrie (aka krzykajun) sent me a copy - and wouldn't accept anything in return, even though I offered! It arrived today, and after I finished putting my grocery shopping away, I sat here for a good 20 minutes just looking through it. I LOVE it! There are quite a few patterns in there - not just the one I specifically wanted - that I think I'd like to try. I'm so happy I was literally doing the happy dance when I saw what it was!

Hopefully by this time next week I'll be finished with the baby afghans. If not, I hope I'm at least CLOSE to finishing!!

Hope is never a bad thing, right? ;)